Hey there @Nabil_Mouline!
It’s a bit contradictory what you are asking, as per definition a pivot table is about giving the possibility to change how and what data is displayed and not changing the data itself.
But theory aside, it sure is possible to do what you’re asking!
With the first choice being what component to use, the safe option would be a Table component. It would also be possible to do it with a Detail or Form component, but I guess it is also desired having the table-like structure.
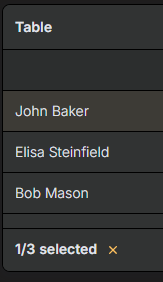
With that in mind, I would do it with a Table component, setting up the values in the first column as the labels for the following ones:
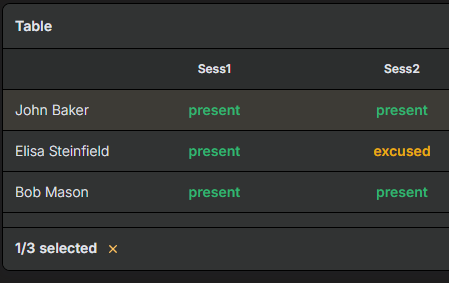
The following columns then hold the values for each session:
Of course you can have whatever as column name: some name like in this example, the date of the session, etc.
The important thing now, is what should the field type for the sessions be. There would be a lot of options but since you said
it comes down to either Select/Tag (a select displaying as tag), Multiselect/Tags (same, but with multiple choices) and to the surprise of some Context menu button (not a conventional select, but rather an action menu).
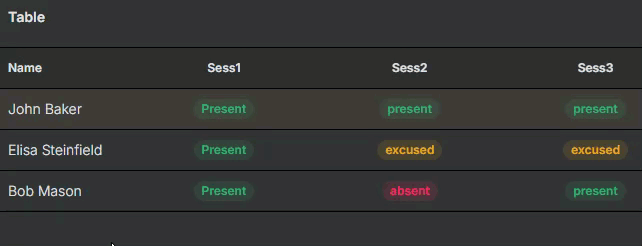
With the Select/Tag (we will not take Multiselect/Tags into consideration) the set up is pretty straight forward.
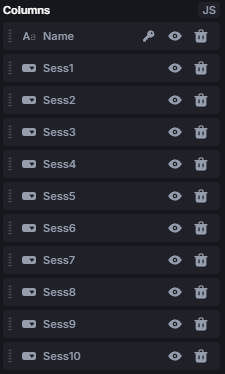
- set up a table like mentioned before (label column and then a column for each session) and give apropiate field types
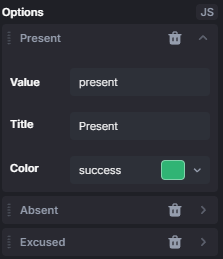
- for each session column set the options and adjust the settings of the field to your liking
- give the table the appropiate data
Et voilà! You got yourself a table where you can set the attendance for each session
But,
as you can see, to change the attendance for a student you need to open edit mode for either the whole table or just a row, edit it and then save again. This can be changed so that the edit mode is always open and it saves all the time, but then it just doesn’t look that good anymore right?
That’s why I would actually recommend using the Context menu button field type. It is a little more tedious to set up, but looks way better and theres no need to change to edit mode. The result would look like this:
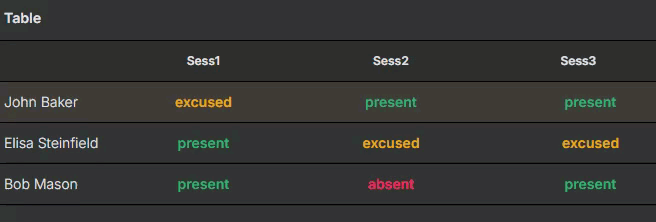
Essentially not a lot changes between those two field types. The main difference is that the Context menu button is just like the name says, a button context and not a select. That means we need to manually set what happens when pressing on the choices.
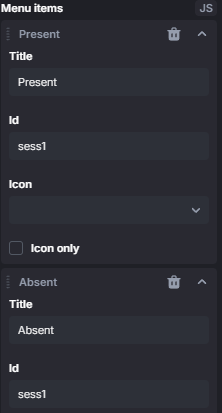
But first you’ll need to setup the fields. There’s no need explaining the View settings I did to make it look like that. The important things are:
Firstly, the Menu items which in our case are similar to the options of a select. Here the Id field is of utmost importance, because we’ll use that to identify the column we’re on, so give each menu item the same id for its column (here sess1):
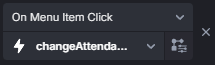
Then you need to setup an action that executes when clicking on the menu items and it is just as simple as:
let list = getData(); // get your data
let student = list.find(s => s.name === {{data.row.name}});
student[{{data.id}}] = {{data.title.toLowerCase()}}
return null; // technically not even needed
Since I’ve prepared the data of the students with the same names as the ids of the menu items(sess1, sess2, etc.) I can simply use that value to set the apropiate attribute of the student’s data.
All thats left is setting the action for all the columns like:
If you also want to implement the different view options a pivot table offers, check out the Chart & Metric components.
Hope one of these answers can help you, feel free to ask for anything!